In an earlier post, we considered How to create an SPF record for a domain that uses Google Gsuite to prevent email spam and fraud. Another way to prevent spammers from sending emails from your address is by setting DKIM authentication—a slightly more involved process, though quite similar to SPF.Google recommends that you add DKIM authentication for each of your domains. If you use G Suite, you can check the state of your SPF configuration using Google Toolbox.
GENERATING A DOMAIN KEY
The first step in setting up DKIM authentication with Google G Suite (which is detailed here by Google) is to log in to your admin console account.
Click Apps > G Suite > Gmail
Scroll down to where it says “Authenticate email”
From the drop-down list (assuming you have more than one domain associated with your account), choose the domain name for which you want to generate a new record. Then below the large grey box, click the “Generate new record” link. A popup will ask you to choose a “prefix selector”, but just accept the default (“google”) option and click the “Generate” button.
You will now see a lot of information appear in the grey box that was empty before:
This strange-looking information will help machines out on the internet to verify that any emails @ your domain name were actually sent by you.
UPDATING YOUR DNS RECORDS
You now need to update the DNS records for your domain. That’s a fancy way of saying that you need to make this DKIM information available on the internet.
How you set up DNS records will depend on your web hosting service, so you may have to contact your web host to get details about that. (Google has some general guidelines here.) If you are using CPanel, you can implement the following steps.
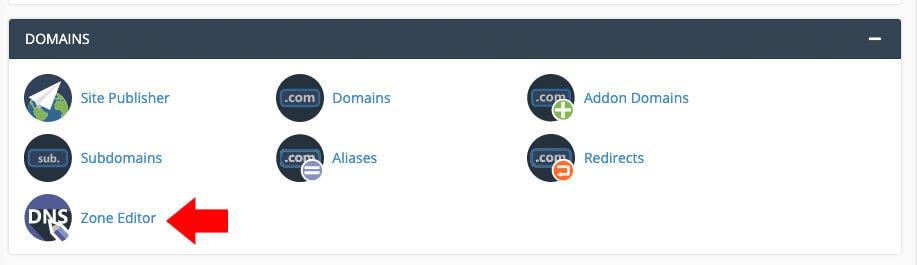
Firstly, for each domain that you have associated with your G Suite account, login to your CPanel account and under DOMAINS click on “Zone Editor” option.
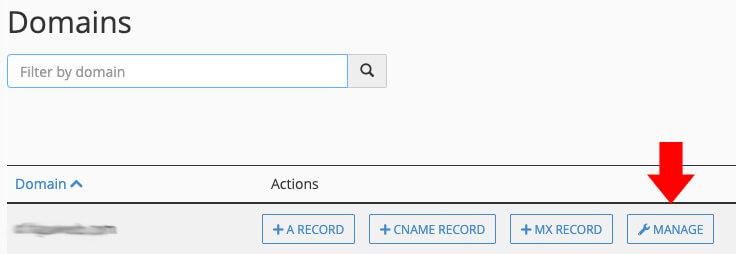
Next click on “MANAGE”
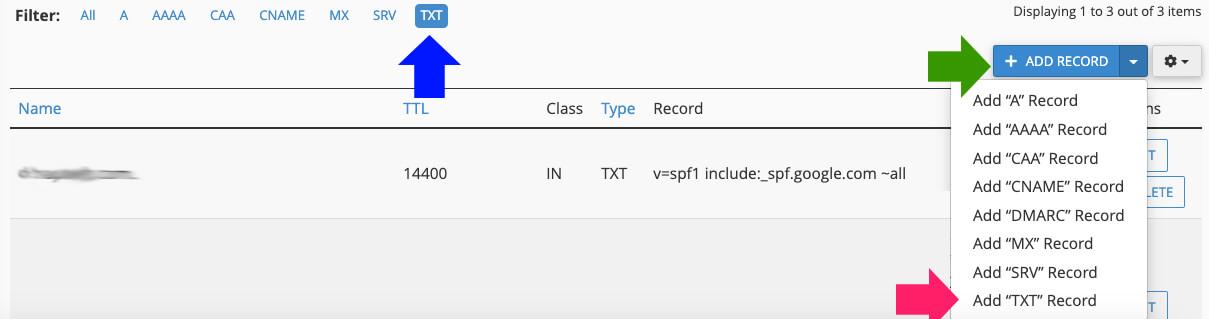
Next click on TXT (blue arrow). In the resulting page, Click on ADD RECORD (green arrow). Then click on the ADD TXT RECORD button (red arrow).
You’ll then see a small form like this:

Into the “Name” field, paste google._domainkey.
In the “TTL” (meaning “time to live”) field, you can basically type any number, but a common one to use is “14400”. (This just tells computers around the world how long—that is, how many seconds—to store this information before checking that it is still current.)
From the drop-down list, choose “TXT”.
In the “Address” field, paste the remainder of the DKIM record.
Now click the “Add Record” button, and you’re done with CPanel.
TURN ON AUTHENTICATION
The last step is to return to your G Suite admin console and turn on authentication. If you still have the original DKIM record page open, simply click “Start Authentication” at the bottom of the page.

Otherwise, once again click Advanced Tools and click the “Set up email authentication (DKIM)” link again, and choose the domain for which you just changed the DNS record. The page will indicate the status of the domain key for that domain.
Click “Start authentication”. It may take a while for the authentication process to be completed. It can sometimes take a day or two for your DNS records to be updated around the world, so if you get an error message, perhaps take a break and come back to this authentication step a little later.
And that’s it! Your emails are now more likely to reach their destination now because they will be officially “signed” by your domain name. And spammers won’t be able to send out emails pretending to be you. Use Google Toolbox to confirm the DKIM setup.
OTHER SECURITY MEASURES
Apart from DKIM, it is important that you also set up SPF and DMARC. This post shows how to add an SPF record and this details how to add a DMARC record.